
Isn’t crazy how wallpaper is making a comeback?
A few years ago- wallpaper in your home meant it was outdated. Now it’s a trendy, modern way to add color and a fun dimension to the spaces in your home!
When I started planning for this half bathroom renovation, I asked my audience if I should leave the walls as-is or if I should add color. The answer was a resounding- “Add color!”.
I took that idea and RAN WITH IT. knew I wanted to completely change the walls from top to bottom with more than just a coat of paint.
I saw this wallpaper while scrolling through Instagram and knew it was the one! But in Texas we these awful textured walls so I wasn’t sure how wallpaper would work. Would it stick? Would I be able to see the texture through the wallpaper? I could have added joint compound over the walls and then sanded to smooth them out before wallpapering, but that would have been A LOT of work and I really wanted this DIY to be as stress free as possible.
Since it’s a half bathroom, I didn’t want to do floor to ceiling wallpaper because I felt like it might make the space seem smaller, so I decided to to half wallpaper/half beadboard.
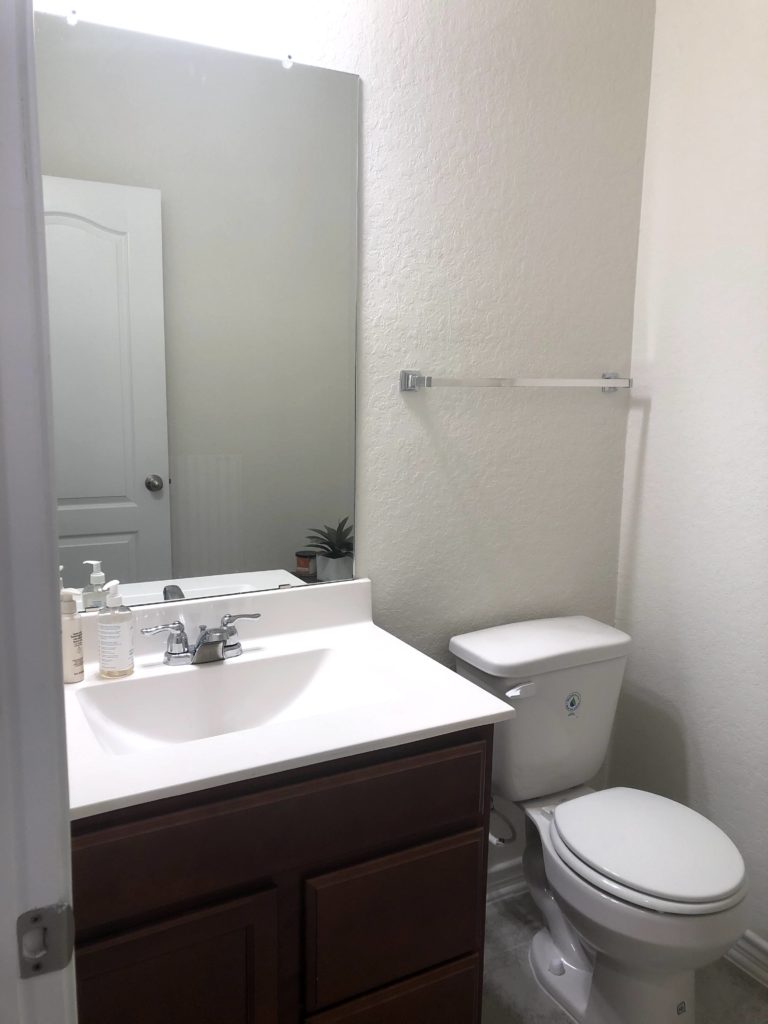
Here’s a “before” photo of the bathroom:
Here’s what I started out with as a moodboard:
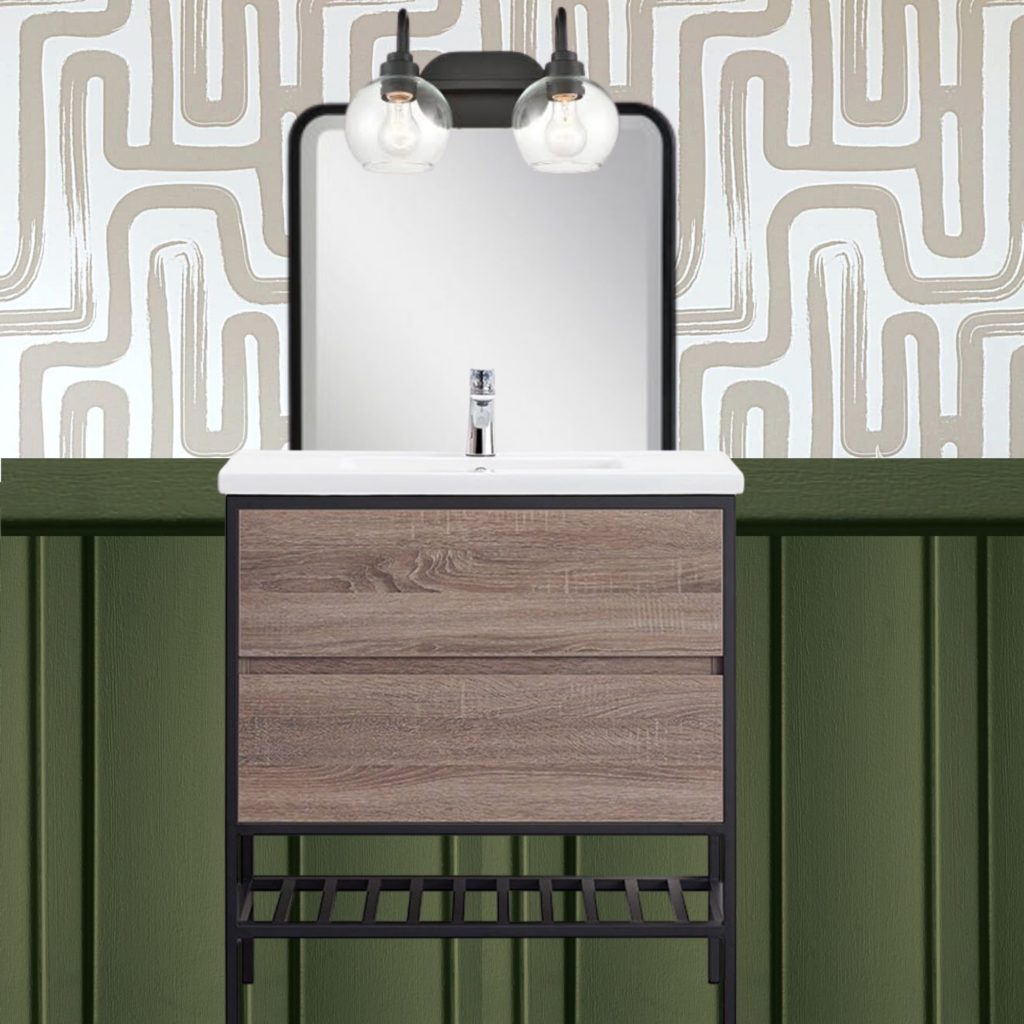
Bold, modern design up top with a moody dark color down bottom. And the vanity just makes all of the colors pop! (More on that in this post.)
Wallpaper can be so tough to install, but Livette’s peel and stick wallpaper was so simple to use. It’s like a big sticker! Super easy to readjust and is 100% removable without damaging your walls. You don’t have to worry about paste, glue, etc. All you have to do is peel back the protective film and stick it to the wall, smoothing as you go. Check out a video of me installing the wallpaper here. (I’m using the Neutral Paint Brush Maze design.)
Tools needed:
Since this was my first time installing wallpaper, I wasn’t sure what to expect. I didn’t know if it would be thin like paper and easy to rip, and it absolutely is not! This wallpaper is so sturdy! It is extremely hard to tear- which is great. You really have to have a box cutter on hand to cut the excess! I was able to do most of this by myself but for a few tough spots like the corners, I called in my husband for an extra set of hands to help me keep it straight!
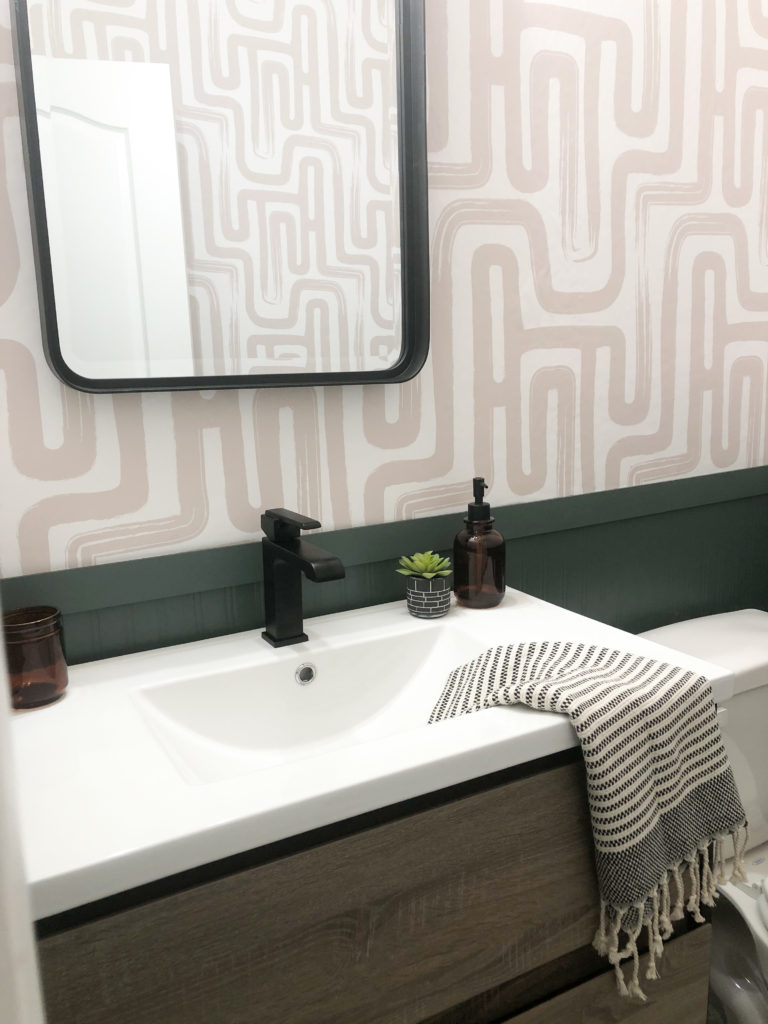
Annnd here’s the finished product! What do you think?

Here are some tutorial videos from Livette’s.
Here’s what I learned:
- The drywall on my walls and ceiling is not level all the way around! This made things interesting when trying to line up the panels
- I was thrilled to find out that you can’t see the texture through the wallpaper for the most part, but there are some sections that are more textured than others where if you look really hard, you can see it. I might consider sanding down the walls before wallpapering next time, but that would add dayssss onto the project, with sanding, cleaning up the dust etc, so I’m not sure it would be worth it…unless I hired the job out.
Overall this is such a simple way to add a punch of color to your space! And with Livette’s Peel and Stick Wallpaper being removable, it’s renter friendly too! Let me know in the comments below if you’d add wallpaper to your home!


I’m considering doing this in my half bath just to give it a little something extra. I love these designs! Thanks for sharing!